
How to Make Your Own Soap
A few years ago, as I dove deeper into homesteadiHow to Make Your Own Soap: A Simple Guide to Soap Making
Have you ever wanted to make your own soap? Whether you’re interested in homesteading, boosting your self-sufficiency, or just want to try something new, soap making is a rewarding and practical skill. Making soap at home isn’t as complicated as it might seem — with a little guidance, you can create beautiful, natural soap that’s perfect for your skin and the environment.
In this post, I’ll walk you through the process of making soap step by step, making sure it’s easy to follow for beginners. By the end, you’ll be able to confidently make your own soap right in your own kitchen!

Why Make Your Own Soap?
Before we dive into the process, let’s take a moment to talk about why soap making is such an appealing skill. For those on a homesteading journey or striving for greater self-sufficiency, making your own soap offers several benefits:
- Natural Ingredients: Homemade soap allows you to choose high-quality, natural ingredients without the harsh chemicals often found in store-bought soap.
- Personalized: You can customize the scent, texture, and properties of your soap based on your preferences. Whether you want soothing lavender or invigorating peppermint, the possibilities are endless.
- Cost-Effective: Making soap at home can be more affordable than purchasing fancy soaps from the store, especially if you make large batches and use ingredients that are easy to find.
- Sustainable: Homemade soap reduces your dependence on plastic packaging and synthetic ingredients, making it a greener choice for the planet.
Now that you know why soap making is a great skill to have, let’s jump into the step-by-step process!
Ingredients and Tools for Soap Making
Before you begin, gather the following ingredients and tools. Don’t worry — none of these items are too complicated to find, and most can be purchased online or at your local craft store.
Ingredients:
- Oils: A combination of oils forms the base of your soap. You’ll need:
- Olive Oil (for moisturizing)
- Coconut Oil (for lather)
- Palm Oil (optional, but adds hardness to the soap)
- Lye: Also known as sodium hydroxide, lye is essential for saponification, the chemical reaction that turns oils into soap. Be cautious when handling lye; it’s caustic.
- Water: Distilled water is best for mixing with the lye.
- Essential Oils: These are optional but can be used to add fragrance to your soap (e.g., lavender, peppermint, or citrus).
- Add-ins: Dried herbs, oatmeal, or colorants can be added for extra benefits and beauty.
Tools:
- A Digital Scale: Accuracy is key in soap making, so a scale is essential for measuring the oils and lye properly. https://www.amazon.com/My-Weigh-KD-8000-Kitchen-Digital/dp/B01C6CN1VY?source=ps-sl-shoppingads-lpcontext&ref_=fplfs&psc=1&smid=A2415BXNCSAYUV&gQT=1
- A Heatproof Container: To mix the lye and water. https://www.amazon.com/Encore-Plastics-LS61086-Measure-Container/dp/B002NUHC4W?&linkCode=ll1&tag=hobehifa-20&linkId=179ace6611248cb62f6906f05d234060&language=en_US&ref_=as_li_ss_tl
- A Large Pot or Mixing Bowl: For melting the oils.
- An Immersion Blender: This is used to mix the oils and lye solution quickly. https://www.amazon.com/gp/product/B000EGC9SG/ref=as_li_ss_tl?ie=UTF8&linkCode=sl1&tag=hobehifa-20&linkId=821a80c888d47424f19df213f0d551fc
- Thermometer: To keep track of accurate temperature. https://www.amazon.com/KIZEN-Infrared-Thermometer-Gun-Humans/dp/B07VSHR9M6/ref=sr_1_4?crid=33CH2N33FJKR5&dib=eyJ2IjoiMSJ9.KL92lMkFVf2n6vA63IOtEKiSlNjf-zICCMb4iFTnnSgzX4DSAeCMFt-oEkd9r6E7RX1n57X_Q4ZE9594o5TGuqpXbppwiHmWw2APT0-LWLqMXMDqevw4Zbe_EWmUxLuP7ePJ0UWHQPf8F5nSXNoUgWUEQIpmf0idAiqaLyd9OZM4VLM-xEjBYeAaTry6_okxLM9IA15VSePaQbtJ2IU4MpBmG8orXF4mOYP0uj0X_ozsjJtdRrF_KYE_MSs0qltuLHWiR9SncKRQfIplJGbXq7ShN1fquSSIfCyrPZq_h4FLq_rr8XumBcHMlwu1pjpUorOBO4l1bxTrm51g7rAfqwg0wuUuw99rNr1tNamg0-w.WgdkQUtQyW2vFKUD4it89YMfGoGriraPbZq70ad3ZzE&dib_tag=se&keywords=nfrared%2BThermometer%2BTemperature%2BGun%2B1080%2C%2B-58%C2%B0F%2Bto%2B1130%C2%B0F%2Bfor%2BMeat%2BFood%2BPizza%2BOven%2BGriddle%2BAccessories%2C%2BHeat%2BGun%2Bfor%2BCooking%2C&qid=1735256945&s=home-garden&sprefix=nfrared%2Bthermometer%2Btemperature%2Bgun%2B1080%2C%2B-58%2Bf%2Bto%2B1130%2Bf%2Bfor%2Bmeat%2Bfood%2Bpizza%2Boven%2Bgriddle%2Baccessories%2C%2Bheat%2Bgun%2Bfor%2Bcooking%2C%2B%2Cgarden%2C100&sr=1-4&th=1
- Molds: Silicone molds work great for soap making, or you can use wooden boxes lined with parchment paper. https://www.amazon.com/Hepgodin-Wooden-Rectangle-Silicone-Standard/dp/B09YPB3SPP/ref=sxin_16_pa_sp_search_thematic_sspa?content-id=amzn1.sym.27b41115-b206-47c3-8621-713097e8442c%3Aamzn1.sym.27b41115-b206-47c3-8621-713097e8442c&crid=BM8HK3O4YR77&cv_ct_cx=regular%2Bsoap%2Bmold&keywords=regular%2Bsoap%2Bmold&pd_rd_i=B09YPB3SPP&pd_rd_r=15404774-60ba-4c2b-b6fb-177d78979a6e&pd_rd_w=p2Xx9&pd_rd_wg=KfGVr&pf_rd_p=27b41115-b206-47c3-8621-713097e8442c&pf_rd_r=3X8SXJJC8R3VCYGNXWNM&qid=1735257070&sbo=RZvfv%2F%2FHxDF%2BO5021pAnSA%3D%3D&sprefix=regular%2Bsoap%2Bmold%2Caps%2C106&sr=1-2-6024b2a3-78e4-4fed-8fed-e1613be3bcce-spons&sp_csd=d2lkZ2V0TmFtZT1zcF9zZWFyY2hfdGhlbWF0aWM&th=1
- Safety Gear: Gloves and goggles are important to protect your skin and eyes from lye.
Step-by-Step Guide to Making Soap
Now that you have everything you need, let’s get started! Here’s a simple process you can follow to create your very own handmade soap.
Step 1: Prepare the Lye Solution
First things first, lye can be dangerous, so always wear gloves and goggles when handling it. Begin by measuring the water and lye using your scale. The amount of lye and water depends on your specific recipe, but it’s important to follow the ratios carefully to ensure the right chemical reaction.
Once you’ve measured the water, pour it into a heatproof container. Then, slowly add the lye to the water, not the other way around (this prevents dangerous splashing). Stir gently until the lye has dissolved completely. The solution will get hot, so set it aside to cool.
Let the lye solution cool to about 100°F (37°C). This cooling process can take 20-30 minutes, so you can move on to the next step in the meantime.
Step 2: Melt the Oils
While the lye solution is cooling, it’s time to prepare your oils. Measure out your oils using your scale. I recommend using olive oil for moisturizing, coconut oil for lather, and a small amount of palm oil for hardness.
In a large pot, combine the oils and heat them gently until they melt completely. This will usually take just a few minutes over low heat. Once the oils are fully melted, remove the pot from the heat and let it cool to about 100°F (37°C), the same temperature as the lye solution.
Step 3: Combine the Lye Solution and Oils
Once both the lye solution and oils have cooled to the same temperature, it’s time to combine them. Slowly pour the lye solution into the melted oils, stirring gently with a wooden spoon or spatula. Then, use your stick blender to blend the mixture. Blend in short bursts, taking breaks every few seconds, until the mixture reaches “trace.”
What is trace? Trace is when the soap batter has thickened to the point where you can drizzle a small amount of it back onto the surface and it leaves a trace or line before sinking in. At this stage, the soap is ready to move on to the next step.
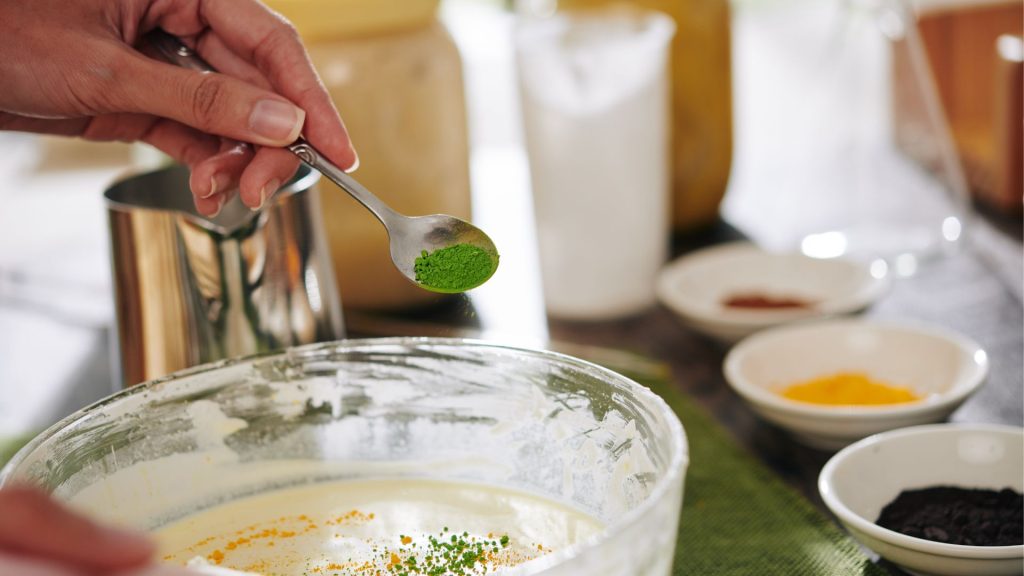
Step 4: Add Essential Oils and Optional Add-ins
Once you’ve reached trace, it’s time to customize your soap. If you want to add essential oils for fragrance, this is the moment. You can also add colorants, oatmeal for exfoliation, or dried herbs for texture. Mix these ingredients in thoroughly, but be gentle so you don’t lose the trace.
If you’re new to soap making, start with simple essential oils like lavender or peppermint, which are easy to work with and smell wonderful.

Step 5: Pour the Soap into Molds
Now that your soap is ready, it’s time to pour it into molds. Silicone molds work great because they make it easy to pop the soap out later. Pour the soap batter into the molds, filling them to the top. Once the molds are full, tap them gently on the counter to release any air bubbles.
You can also use a wooden box lined with parchment paper for a more rustic look, but silicone molds are easier for beginners.
Step 6: Let the Soap Set and Cure
After pouring the soap into molds, cover them with a clean towel or blanket and let them sit for 24-48 hours. During this time, the soap will harden and become firm to the touch. You’ll know it’s ready to unmold when the soap feels solid and no longer leaves an impression when you press on it.
Once the soap has set, remove it from the molds. At this point, your soap will still be too soft to use immediately. Place the soap on a tray or cooling rack and let it cure for 4-6 weeks. Curing allows the soap to dry out and harden, which helps it last longer and form a mild, gentle lather.
Tips for Successful Soap Making
- Use a Soap Calculator: To get the best results, you can use a soap calculator (available online) to determine the exact amounts of lye and oils you need based on the recipe you’re following.
- Don’t Rush the Process: Soap making is a craft that takes time. Don’t rush through the steps, especially the curing process.
- Keep Notes: It’s a good idea to keep track of your recipes, so you can adjust them if needed for the next batch.

Final Thoughts
Making your own soap is a wonderful way to practice homesteading and embrace self-sufficiency. Not only does it allow you to control the ingredients in your soap, but it’s also a satisfying craft that results in beautiful, natural products. With this step-by-step guide, you’re well on your way to making your own soap — a simple, sustainable, and enjoyable activity that’s perfect for anyone looking to reduce their reliance on commercial products.
So, grab your ingredients, put on your safety gear, and start making your own soap today! You’ll be amazed at how rewarding it is to use something you made with your own hands.


